Amazon KDP Account Setup Guide for Self-Publishing Authors
Amazon KDP Account Setup Guide
Estimated reading time: 14 minutes
Key takeaways
- Setting up a KDP account is straightforward: use an Amazon account, verify your identity, add banking and tax details, and you can publish right away.
- Accuracy matters: use your legal name for payments, double‑check bank routing and tax info, and complete phone verification to avoid delays.
- When you’re ready to publish multiple titles, tools that automate uploads and manage platform differences make distribution practical and fast.
Table of Contents
- Overview
- Step‑by‑step KDP account setup
- After setup: the Bookshelf and first title
- Publishing at scale with automation
- FAQ
Overview
This amazon kdp account setup guide walks you through what you actually need to open a KDP account, why each piece of information matters, and what to check so your first royalty payment and tax forms work without a hitch. New authors often expect a long, bureaucratic process. In practice you can finish registration in one sitting — but accurate details and a couple of verifications are non‑negotiable.
If your goal is to publish more than one book, you’ll outgrow one‑by‑one uploads quickly; that’s when you consider tools that automate repeated uploads so you can reliably Self Publish Book Amazon KDP at scale without copying the same metadata into five different forms every time.
This guide covers the registration steps, phone and identity verification, banking and tax fields, what to expect in the Bookshelf dashboard, and a practical look at how automation changes the work of publishing.
Step‑by‑step KDP account setup
Before you start
- Use an existing Amazon account if you have one: it links payment history and reduces friction with proof orders and author central later.
- Prepare the legal name you’ll use for payments, a bank account that accepts international deposits if you sell globally, and your tax ID or social security number for tax forms.
- Have a phone nearby for two‑step verification.
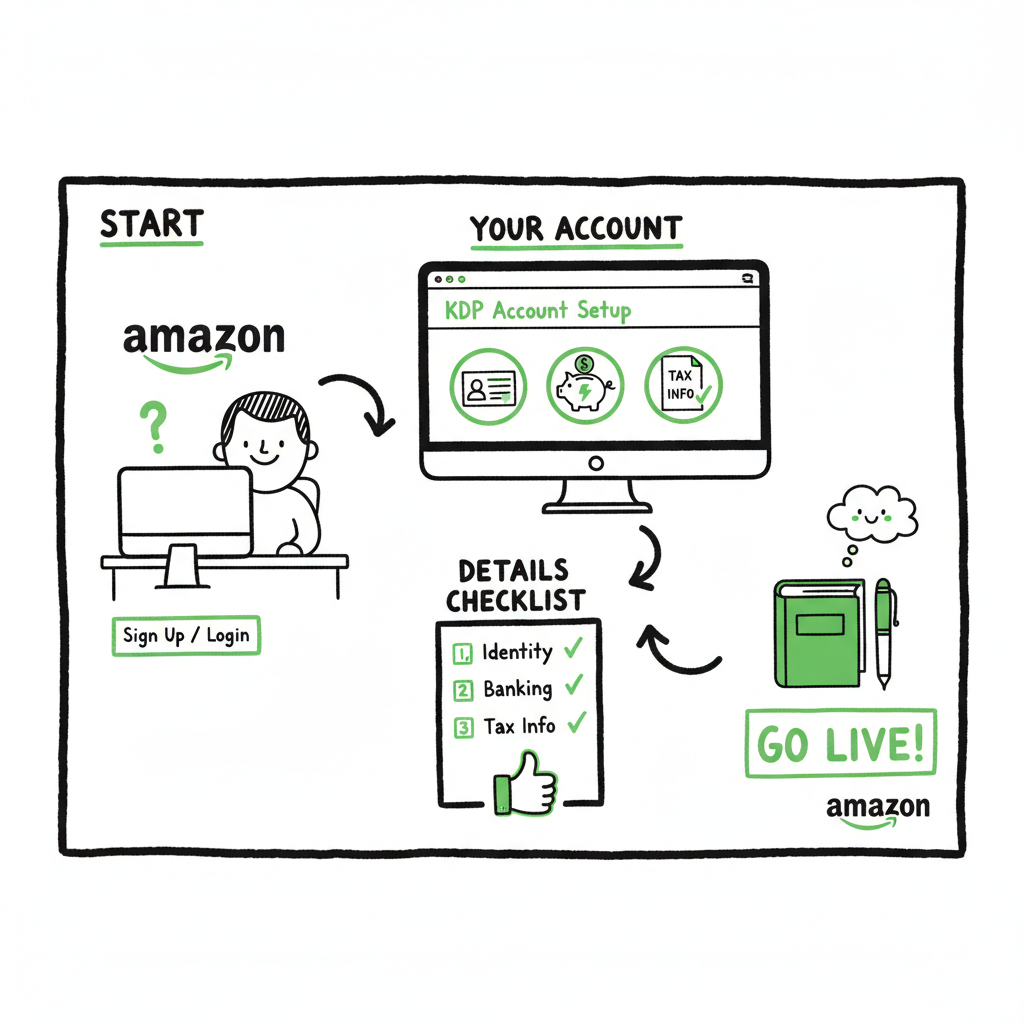
- Sign in or create an Amazon account
Visit kdp.amazon.com and click Sign in or Join KDP. You can create a new Amazon account (name, email, password) or reuse an existing one. Reusing an account speeds things up if you already buy print proofs or have an author central page. - Account type and primary contact
KDP will ask whether you’re registering as an individual or a business. You can publish as an individual; a formal business entity isn’t required. Still, enter the legal name that matches your tax documents and bank account. Use pen names later in a title’s metadata, not here. - Phone verification and two‑step authentication
Amazon usually enforces two‑step verification. Provide a phone number that receives SMS or voice calls and complete the one‑time code confirmation. This is a frequent cause of delay, so test the number before you begin. - Banking information
Add the bank account where royalties should be deposited. KDP requires routing codes and account numbers appropriate to your country. If your bank and country support direct deposit, set that up; otherwise, Amazon may route payments through intermediaries. Mistyped numbers are the most common reason royalties fail to arrive, so copy and paste where possible. - Tax interview
Complete the online tax interview. KDP needs your taxpayer classification and identification (for individuals, typically a Social Security number or national tax ID). The interview determines withholding rates and whether you need to supply a W‑8BEN (non‑US) or W‑9 (US) form. - Payment thresholds and currencies
Understand minimum payout thresholds and the currency Amazon pays in for your region. These details appear in the account settings and on royalty reports. - Confirm settings and access the Bookshelf
Once these pieces are saved, you’ll land in the Bookshelf. From there you can create ebook, paperback, or hardcover titles, upload manuscripts and covers, set pricing, and publish.
Practical tips during setup
- Use a desktop browser. Mobile signups work but a larger screen helps you review long tax forms and bank fields.
- Keep your ID or tax documents handy for quick reference.
- If you do business through a company later, you can update your account type, payment information, and tax forms in account settings.
After setup: the Bookshelf and your first title
What the Bookshelf does
The Bookshelf is the central dashboard for adding and managing titles. It shows each title’s status, sales reports, and enrollment options like KDP Select. Typical workflow: choose a format (ebook, paperback, hardcover), fill metadata (title, series, contributors), upload manuscript and cover, choose territories/pricing, and publish.
Using pen names and publisher names
You use your legal name in account details for payments. On each title you can supply a pen name or imprint. Keep metadata consistent across platforms to build discoverability: same author name, similar descriptions, and consistent series data.
Manuscript and cover formats
– Kindle ebooks accept formatted MOBI/AZW3 or well‑formed EPUB files. If you’re converting to EPUB from a Word manuscript, validate the file before upload to minimize rendering issues on different Kindle devices.
– Paperbacks require a PDF interior with correct trim size and margins, plus a cover PDF that includes spine and back cover. If you’re creating both ebook and paperback, export the appropriate files for each.
If you convert manuscripts to EPUB, use a reliable converter and check final files on multiple readers; poor EPUB conversion is a common source of formatting complaints and refunds. For a simple, automated conversion pipeline, see tools that specialize in batch EPUB conversion to reduce repetitive fixes and speed up publishing.
Covers: produce a print‑ready cover and an ebook cover sized per Amazon’s guidelines. If you design covers in batches or use a generator, make sure you produce high‑resolution files and test thumbnails for discoverability.
Proof copies and review
Order a proof copy for paperbacks to verify trim, color, and binding. For ebooks, use Amazon’s previewer and test on the Kindle Previewer app and on a real device.
Metadata, pricing, and distribution
– Fill title, subtitle, description, keywords, and categories carefully. Description and categories affect discoverability more than people think.
– Select territories carefully. For global distributors, check regional pricing and minimum royalties.
– Consider KDP Select if exclusivity for Kindle is acceptable in exchange for promotional tools.
Common setup mistakes and how to avoid them
– Mistyped bank numbers or wrong tax ID: double‑check copy/paste and country formats.
– Using a pen name in the payment fields: use legal names for payments and tax forms.
– Uploading the wrong file type for print interiors: verify trim size and bleed before exporting PDFs.
– Ignoring proof reviews: always order at least one proof and scan the physical copy.
Publishing at scale with automation
When one title becomes many
If you plan to publish multiple titles, manual uploads become a bottleneck. Repeatedly entering the same metadata, converting files, and toggling platform options wastes time and increases error risk. Automation is the operational upgrade: CSV batch uploads, platform‑specific intelligence to map metadata fields, and consistent file processing cut repetitive work dramatically.
What automation removes from your workload
- Manual entry of the same metadata across platforms
- Reformatting the same manuscript for different ebook and print specs
- Recreating cover packages for print and ebook
- Manually tracking which formats and territories are live
Key automation features that matter
- Unified multi‑platform publishing so you push one package to Amazon KDP, Kobo, Apple Books, Draft2Digital, and Ingram.
- CSV batch uploads that let you create hundreds of titles with a spreadsheet and a folder of files.
- Platform‑specific intelligence that maps your single source metadata into each store’s required fields.
- Error reduction through validations that catch missing ISBNs, invalid pricing, or wrong file sizes before upload.
Why automation is an obvious upgrade
Manual uploads are fine for one or two books. When you publish seriously — multiple authors, series, or frequent releases — automation saves time and reduces mistakes. In our experience automation often produces around 90% time savings on the upload and distribution steps alone. That makes wide distribution practical and profitable.
Practical workflow when using an automation service
– Prepare a single definitive metadata CSV that includes titles, series info, contributors, pricing, and territories.
– Produce one high‑quality manuscript file and one cover per format, then feed them into the system.
– Let the automation tool validate files, convert to platform formats (for example, create EPUBs where needed), and submit to target platforms.
– Monitor status from a single dashboard and download consolidated reports.
Related production tasks and recommended tooling
– If you create a paperback or ebook, use a system that supports both interior PDFs and ebook packaging so your files remain linked to a single title record.
– When you need to generate a cover quickly or at scale, a cover‑generator tool that outputs print‑ready and web‑ready files saves hours of rework.
– Converting a batch of Word files to validated EPUB for different stores is a frequent pain point—an automated EPUB converter removes that friction.
Tools you might use
– For cover creation at scale, a cover generator can create consistent series covers and export print‑ready files for paperbacks and thumbnails for ebook stores.
– For manuscript conversion, a dedicated EPUB converter gives you consistent results and removes device‑specific formatting errors.
– For multi‑platform distribution and batch uploads, look for services that integrate with Amazon KDP, Kobo, Apple Books, Draft2Digital, and Ingram and can handle CSV imports.
How automation affects quality control
Automation doesn’t replace human quality checks. It reduces repetitive errors and preserves consistency, but you still review a sample of proofs and ebook previews and spot‑check metadata after upload. The combination of automation plus a small QA checklist is the most efficient path to reliable wide distribution.
Practical example: from spreadsheet to storefront
Start with a single CSV row per title that includes metadata, file names, and pricing. The automation system validates the files referenced in that row, converts manuscripts to EPUB or print‑ready PDF as needed, and submits the package to each platform with platform‑specific mappings applied. After a short processing period, you receive a report of successful submissions and any items that need attention.
If you want a simple next step for handling multi‑store uploads, begin by standardizing your metadata in a spreadsheet and creating a single, reviewed set of interior and cover files. Then test a batch upload with a handful of titles to observe how the platform maps fields and where you need to refine your CSV templates.
FAQ
Do I need a business to create a KDP account?
A: No. Individuals can sign up and publish as “individual.” You only need a business entity if you want payments and tax filings under a company name; otherwise, use your legal name for payment and tax fields and add pen names in title metadata.
How long does verification take?
A: Most phone and email verifications are immediate. Tax interviews and bank verifications are usually completed in the signup flow, but payments may be scheduled according to Amazon’s payout cycles. If there’s a problem with bank details or tax forms, expect delays until you fix them.
Can I change my payment or tax information later?
A: Yes. Update account settings and tax info in your KDP account. If you switch payment methods, confirm new routing and account numbers before your next royalty payment.
What file formats does KDP accept?
A: For ebooks, upload EPUB or well‑formatted MOBI/AZW3. For paperbacks and hardcovers, upload print‑ready PDFs for interior and cover. Validate all files with Amazon’s preview tools and order a proof for print.
What’s the difference between account name and pen name?
A: Your account uses a legal name for payments and taxes. The pen name or imprint appears on the book’s product page and is entered in title metadata.
How do I publish the same book to other stores?
A: Each store has its own uploading requirements. If you plan to publish widely, convert or package files for each store, or use a multi‑platform distribution and batch upload tool to handle the differences automatically.
Final thoughts
Setting up a new KDP account is a one‑time operational step: invest a little care in the legal name, phone verification, banking, and tax fields, and you’ll remove most friction for future publishing. When you start publishing multiple titles, the manual approach becomes a time sink and an error risk. At that point, unified multi‑platform publishing and CSV batch uploads make wide distribution practical.
A few practical links to help common production tasks:
– If you need a reliable EPUB conversion pipeline for multiple titles, look for a converter that validates output and handles batch jobs.
– If cover creation is on your to‑do list, a cover generator will produce print‑ready and ebook versions quickly.
– If you’re producing both paperback and ebook files, choose a workflow that keeps the different format files linked to the same title record.
Automate the upload. Own the distribution.
Sources
- Set Up Your KDP Account – Amazon.com
- Create a KDP Account – Amazon.com
- Set up your KDP account – Amazon.com
- How to Set Up Your KDP Account the Right Way – Writer’s Life.org
- How to Publish on Amazon KDP: Guide with Pictures (2025) — writersofthewest.net
Amazon KDP Account Setup Guide Estimated reading time: 14 minutes Key takeaways Setting up a KDP account is straightforward: use an Amazon account, verify your identity, add banking and tax details, and you can publish right away. Accuracy matters: use your legal name for payments, double‑check bank routing and tax info, and complete phone verification…